Wildlife food plots are a strategic tool for anyone looking to attract deer, upland birds, turkeys, and other species to their land while supporting habitat diversity and sustainability. Whether you manage a small rural property or a larger parcel, a well-planned food plot can provide vital nutrition year-round, while offering excellent opportunities for wildlife observation, photography, or hunting.
Why Food Plots Matter
Food plots supplement natural forage, especially during stressful seasons like late fall or early spring. By planting nutritious crops, you’ll not only draw more wildlife but also contribute to overall ecosystem health. But successful food plots don’t just happen; they rely on science, careful site selection, and, most importantly, soil testing.
Step 1: Smart Site Selection
Ideally, choose a site that receives at least half a day of sunlight and is near cover, so wildlife feels secure venturing out to feed. You should avoid placing plots right next to property lines or roads, as these locations increase risk from human and vehicle disturbance. On most properties, several smaller food plots are better than one large block, a few one-acre plots scattered over 40+ acres improve wildlife access and use. If possible, use natural clearings, old fields, or edges of wooded areas, these sites often offer the best blend of sunlight, cover, and easy plot preparation. Of course, at the end of the day, any location that you have available can be made suitable through proper plant species selection and fertilizer guidance. This is the case for myself, I have about 1.5 acres that was an old pasture on my property and is adjacent to a failed vineyard that we inherited when we purchased, a three acre, shallow soiled hillside that also was a seasonal pasture, and about a quarter acre that I can actually run enough hose to irrigate that is next to the driveway; do any of these makeup what would be considered the ideal site? Nope. Did I seed them to different species compositions as food plots? Yep. Do I get to see animals in each of them? What I’m getting at is this: If the site that you have available for a food plot doesn’t check every box, but it’s the space you have, follow the steps below and seed it anyway, something is certainly better than nothing!
Step 2: Soil Testing—The Foundation of Food Plot Success
A soil test is the most crucial and most overlooked step in food plot establishment. It removes guesswork by revealing your soil’s pH and nutrient profile, so you can apply the precise amount of lime or fertilizer required for healthy, productive plots. Our preference is the MySoil soil test kit for its accuracy, ease of use, and amazing guidance. Most wildlife food plot crops thrive in soil with a pH of 6.0 to 7.0. If your soil is acidic (low pH), adding lime can dramatically increase yield, even more than adding fertilizer alone in some situations. On the other hand, if your soil pH is too high, adding sulfur can move your pH down into the optimal range for your food plot. MySoil recommends testing each unique area, including wildlife plots, before planting to maximize efficiency and minimize costs related to over- or under-fertilizing.
Ideally, collect soil samples several months ahead of your planned perennial planting to give lime or sulfur time to work its magic. Don’t panic if you missed this sampling well in advance, guidance just before planting will get your pH and nutrient levels heading in the right direction and ensure season one success that will only be enhanced over time.
Step 3: Prepare and Plant Your Plot
Direct Seeding
Remove or minimize existing vegetation through mowing or herbicide application based on what’s present. Be certain that the residue is not too thick to seed through. What can you do if there is too much residue? You can mow again to make the particles smaller; you can drag to try to begin spreading out the material more evenly over the area, or in instances of extreme residue and where allowed, you could burn the residue. Thorough weed control is also essential to minimize early competition. Spot spraying unwanted species prior to seeding is a great strategy if you have not sprayed already.
Now, choose a seed mix suited for your target wildlife. Cool-season grains (wheat, oats, rye), perennial legumes (clover, alfalfa), and brassicas (turnip, radish) are excellent choices. Small seeds should only be buried 1/8–1/4 inch; larger ones go 3/4–1 inch deep. Follow the seeding guidelines associated with the seed blend that you chose. For best germination, roll or pack the soil to firm it up; many direct seeders have this built in as packer wheels.
Fertilize based on your MySoil test results. Time your fertilization at seeding or preferentially delay fertilization for 7-10 days to ensure that germinating plants have first access to applied nutrients and existing vegetation doesn’t outcompete new seedlings. When direct seeding, surface apply pH amendments in fall prior to seeding for best results. Splitting applications across spring and fall are also a great strategy if significant pH adjustment is needed.

Image 1. Direct seed food plot seed mixture. Don’t forget to calibrate your seeder before heading to the field.

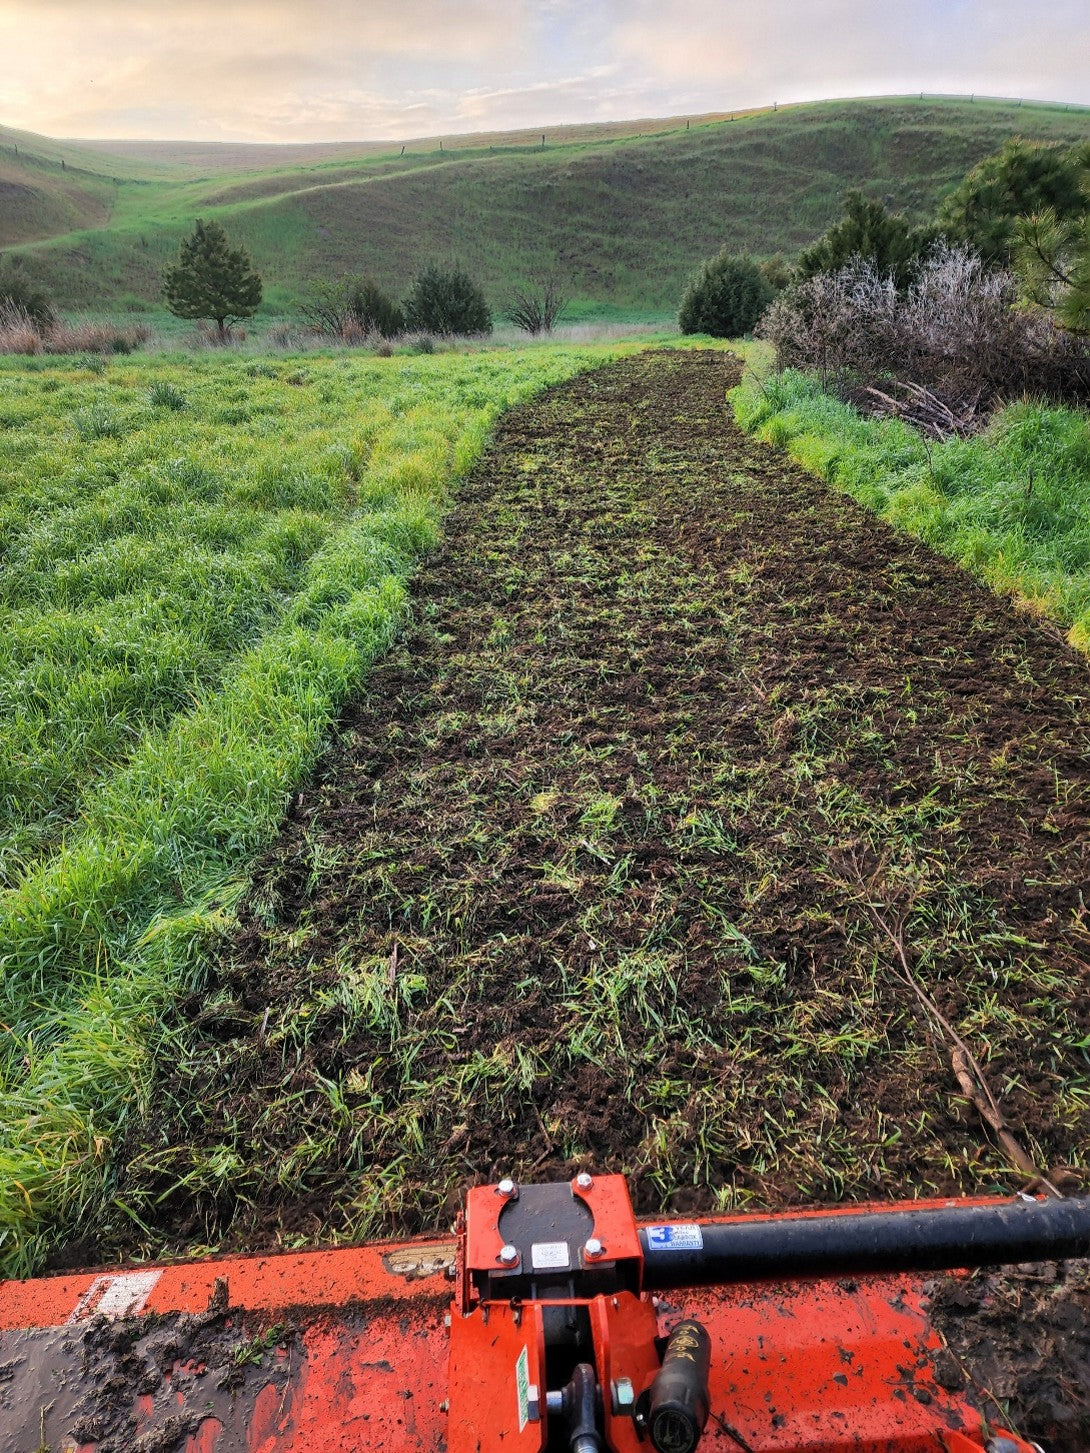
Image 2. Field mowed to three inches, spot sprayed for weeds, and being direct seeded.

Image 3. Growth beginning after direct seeding into an existing pasture.

Image 4. Germination of radish in direct seeded food plot.
Using tillage for seedbed preparation
The steps that we like to use to prepare a seedbed when tillage is an option are to mow, till, and seed. First mow to reduce existing vegetation and to make it easier to till. What can you do if there is too much residue even after mowing once? You can mow again to make the particles smaller; you can drag to try to begin spreading out the material more evenly over the area, or in instances of extreme residue and where allowed, you could burn the residue. Thorough weed control is also essential to minimize early competition. Weed control is initially accomplished through your tillage pass or passes. We then prefer the use of a rototiller (other tillage equipment works well too and may be more appropriate depending on acreage seeded) to till to a depth of 6-7 inches creating a loose and uniform seedbed. Next, we like to seed with a drill and watch our plants grow. Plant at rates recommended for the crop type. Mix small seeds with a carrier such as sand or cat litter for even broadcast distribution.
Below is a series of images of the process. We are planting two separate annual food plots to barley.

Image 5. Mowing food plot area to prepare for tillage.

Image 6. Rototilling/tilling food plot area to prepare for seeding.

Image 7. Using drill to seed a barley food plot.

Image 8. Barley germination and emergence.

Image 9. Early barley growth at food plot

Image 10. Barley growth at food plot.

Image 11. Barley beginning to mature in food plot.
Step 4: Maintain and Monitor
Fertilize and lime as indicated by your soil test results, reapplying as needed according to crop and wildlife usage.

Image 12. MySoil test report for the direct seeded food plot used in the example above. Note a nitrogen-based program that also recommends micronutrient applications. Not shown: Sulfur also found in the recommended fertilizer.
Control weeds through physical means or herbicide spot treatments, young wildlife crops are easily outcompeted by aggressive weeds. Monitor your plots regularly. Use wire “exclusion cages” to compare grazed and ungrazed areas, this tells you if your wildlife population is outpacing plant growth, or if fertility needs adjustment. If I’m being honest, I always recommend this, but never seem to execute it, as I watch trail cameras and observe my food plots regularly as they are located on the property that I reside on. Reseed or rotate crops annually to prevent plant disease occurrence and to maintain performance.

Image 13. Weeds, Common lambsquarters, in the barley food plot. One selective herbicide spray application was used to combat the weeds in this food plot.
Food Plots and Soil Health: The MySoil Perspective
At MySoil, we believe long-term food plot success always starts with knowledge, specifically, understanding your soil’s needs before planting. Our easy mail-in soil testing kits let you identify exactly what to add and when, giving your seed investment the best possible chance for a productive plot. Healthy soils mean robust wildlife and happier landowners.
Ready to start your own food plot or improve your results this year? Order a soil test, contact us with your wildlife goals, and enjoy watching your property come alive with nature!
Keywords: wildlife food plot, soil testing, home wildlife habitat, organic amendments, food plot crops, deer food plot, turkey food plot, food plot soil pH
Share: